Jul 17

Fun FHE Object Lesson: the Armor of God

Here’s an idea for an object lesson on spiritual protection. I first ran across this idea in seminary.lds object lesson ideas

OK so let’s say that the peel represents the armor of God.

When you have the armor of God on, you float! (You are able to overcome temptation, trials, etc.) Another thing you could relate it to could be faith, and bring in the story of Peter walking on the water. Or instead of the armor of God, you could relate it to living worthy of the gift of the Holy Ghost, which keeps our head above the water and can protect us against deception.

But. . .

What happens when you remove this protective peel?

object lesson spiritual protection

You sink!

armor of god fhe lesson

When you compromise your standards, or take off your spiritual armor, you sink.


Here’s a short video about the armor of God that could go along with the lesson.


Jul 17

Quick ‘n Easy Microwave Brownies!

easiest brownie recipe

These are so easy and yummy! Perfect for when you need a quick fix for a brownie craving. I love brownies! Here’s the recipe (contributed by Sherri Boekweg).

Mix together:
2 eggs
1 cup sugar
1/2 tsp salt
1 tsp vanilla

Add:
1/2 cup oil or melted butter and blend thoroughly.

Mix in:
3/4 cup flour
1/2 cup cocoa

Mix at low speed.

Then stir in:
1/2 cup chopped walnuts

(This would be great with chocolate chips too! But I didn’t have any).

Directions:
Spread evenly in greased 8-inch square dish. Microwave at high 6-7 minutes, rotating dish 1/4 turn every 2 minutes (unless microwave turntable rotates already). It is done when top looks dry and will spring back when lightly touched. It cuts best when cool,  but it tastes very good while still warm.

To make a single brownie:
Cook some of the batter in a 4-inch bowl (preferably with straight sides) for 1 minute 30 seconds.
And there you are! The world’s easiest brownie recipe! You’re welcome 😉

how to make microwave brownies

This the bowl I used to cook the brownies in. It is actually a soup bowl. It works well because of the straight edge. I forgot to grease it but it worked fine. While it was still hot I loosened the edge with a knife and turned it over on a plate. Then I used a fork to eat the hot brownie with some milk.

easiest brownie recipemicrowavable dessert recipes

photo (3)


I also tried it in a smaller glass dish, just to see how it would turn out, and it came out great.


brownies in glass bowl

microwaveable brownies

can you cook brownies in microwave

This recipe is great for when you need brownies NOW and don’t want to wait for them to cook in the oven. It’s also great for when you only need an individual serving and don’t want to make a whole pan all at once.

Jul 17

Easy Cheesy Tuna Noodle Casserole

healthy alternative for mac and cheese

This is probably one of my favorite dishes. It’s so cheesy and good. I could probably eat it everyday. Here’s the recipe!

Ingredients for Cheesy Tuna Noodle Casserole:

6 ounces of wide egg noodles (In the picture I used whole wheat noodles, but egg noodles work the best!)

1 cup finely chopped celery

1/4 cup chopped onion

1 can tuna, drained

1/2 cup Mayonnaise (I’ve also used plain yogurt instead, or half mayo half yogurt, and it turns out fine)

1 cup shredded cheddar cheese 🙂

1 can cream of chicken soup (Campbell’s is best!)

1/2 cup milk
Topping:

1 cup potato chips (you can also use fried hash browns or tator tots, like I did in the picture. Chips are easiest though!)

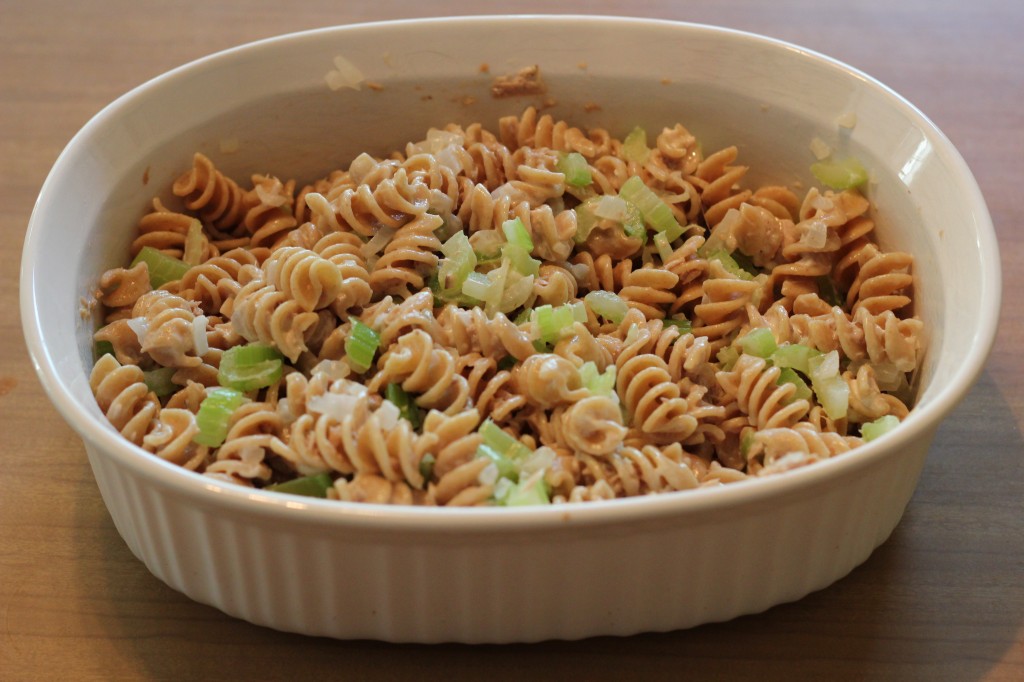
healthy noodle casserole


Directions:

Cook the noodles. Set aside. Also cook the celery and onion in some boiling water until they are as soft as you like them (at least 5 minutes).

Then mix the noodles, mayo, and tuna together in a casserole dish. Mix in celery and onions.


better than mac and cheese sauce


Now combine the cheese, milk, and cream of chicken soup in a pan and heat over medium heat, stirring occasionally,  until cheese is all melted.

creamy sauce casserole


Stir in cheesy soup mixture and mix with the noodle mixture.

homemade hashbrowns


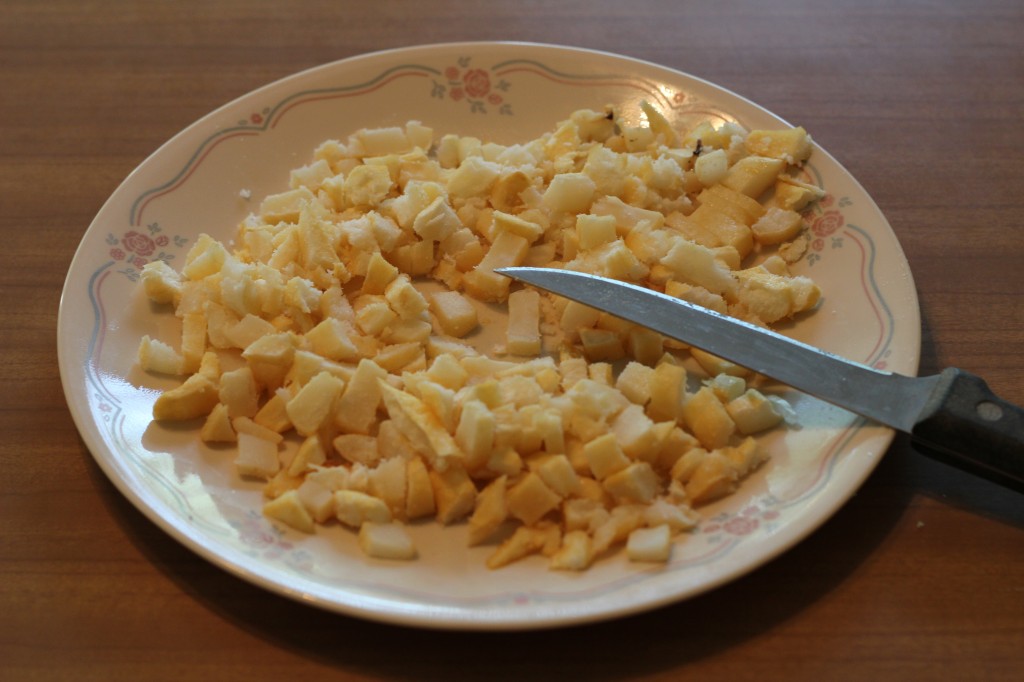
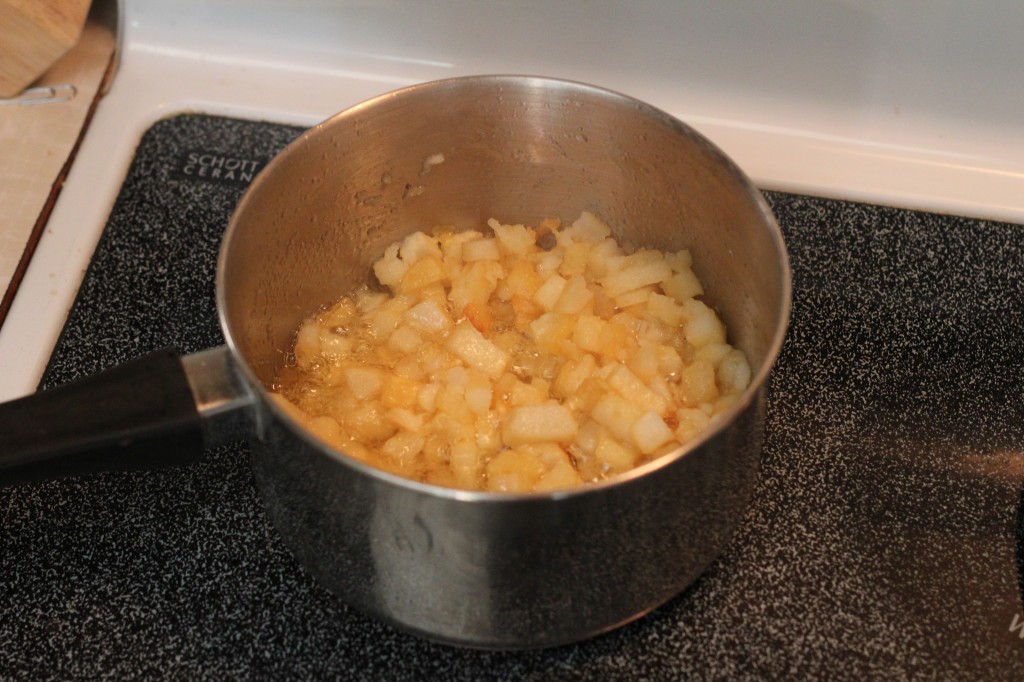
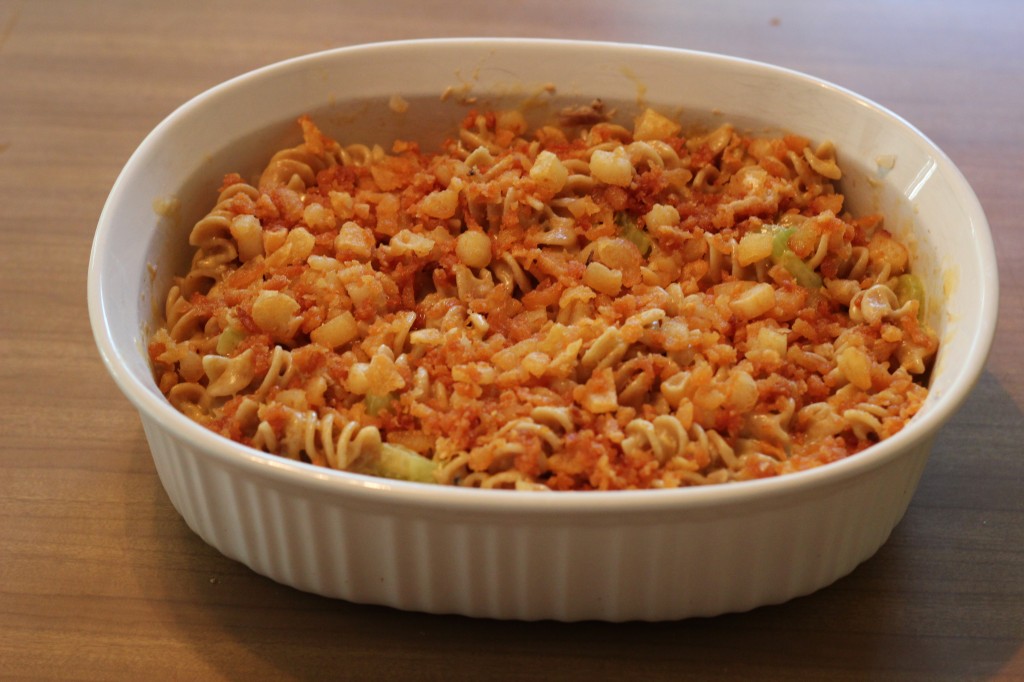
Top with crushed potato chips. Don’t leave these out – this is what makes it so good! Or you can fry up some hash browns in a couple tablespoons of oil. In the picture above, I used frozen french fries, cut up, and fried them. It was very yummy.

substitute for potato chips


I recommend frying them until they get crispy and brown (it seems like it took around 10 minutes but could have been longer or shorter).

crispy creamy tuna casserole


Then spread it over the casserole as a yummy crispy topping. I usually then microwave it uncovered for at least 3 or so minutes to make sure it’s all hot.

creamy cheesy pasta casserole


Then scoop it out and enjoy! I usually try to serve it with sliced tomatoes and cooked peas or other type of vegetables. Hope you like it! Tuna noodle casserole is one of my favorite things to make.


Jul 12

Brazilian-Style Rice & Black Beans Recipe: Easy & Yummy

easy brazilian food

This is my version of Feijoada, a popular Brazilian dish. I decided to try it out last night, and it turned out really good! Pretty healthy too and cheap to make.  I looked at a few recipes online and adapted it a little to fit the ingredients I had on hand. I love Brazilian food. This may not be exactly authentic in how I adapted it, but it was yummy. Here we go!

Ingredients for Brazilian-style Black Beans:

  • 4 teaspoons oil
  • 1/2 cup green bell pepper, seeded and chopped
  • 1 small onion, chopped
  • 3-4 cloves garlic, minced (you could use garlic powder too)
  • 1 (16-ounce) can black beans, drained
  • 1/2 (14.5-ounce) can diced tomatoes
  • 1 1/2 cups chicken broth
  • 1/2 teaspoon basil (most recipes call for thyme but I didn’t have any)
  • 1 bay leaf
  • 1/4 teaspoon oregano
  • 2 tablespoons dried parsley (or cilantro – they recommend fresh but dried works fine)
  • 4-6 ounces (1/2 cup) some kind of meat, cooked and chopped into small-ish pieces (optional).

Directions for making Brazilian-style Black Beans:

  1. In a medium saucepan, heat the oil over medium heat. Saute the bell pepper, onion and garlic, stirring often, for about 10-15 minutes, or until they are very soft and tender. 
  2. Then add the beans, tomatoes, chicken broth, basil, bay leaf, parsley and oregano. Bring to a boil. Cook on low to medium heat, stirring occasionally, until the sauce thickens and the vegetables are tender, about 30-45 minutes. If the mixture becomes too thick, add a tablespoon or two of hot water to thin to desired consistency.
  3. Add the meat chunks and continue simmering until ready.
  4.  Season with salt and pepper if desired. Discard the bay leaf. Serve over the hot rice.

How to make it (step-by-step with pictures):

brazillian beans with green peppers

Saute the garlic, pepper, and onion until very soft and tender.brazilian black beans with onions


Remove from heat and add the black beans…tomato black bean sauce


Also add the tomatoes, chicken broth, oregano, basil and parsley.  Cook over low-medium heat until it thickens up to desired consistency (20 + minutes).brazilian bean recipe with soy sauce


Add in the meat chunks and stir. Cook until everything is hot and consistency is how you want it.

turkey tomato recipe
( I used leftover BBQed turkey steaks from the 4th of July (marinated in soy sauce and 7-up). It was a really yummy combination. Some other recipes recommend using bacon or pork).

brazilian chili

Eat over rice and enjoy! It comes out pretty flavorful with all the spices. And it’s a pretty healthy meal too. I think I’ll be making this again!


Jun 26

Yummy Broccoli Bacon Salad!

This is my mom’s famous broccoli bacon salad recipe! It’s a favorite in my family. It’s a great thing to make during the summer when grapes are so cheap.

Ingredients:

 1 large head broccoli, cut into flowerets
1 cup seedless red grapes, halved.
1 cup raisins
1 cup sliced-thin celery
1 small onion, chopped
1 lb. bacon, fried and crumbled – I usually just use a 3 oz. jar of real bacon bits and it’s plenty.
1 cup sunflower seeds (optional)

Dressing:

1 cup mayonnaise
1/4 cup sugar
1 Tbsp. lemon juice or vinegar

broccoli salad red grapes

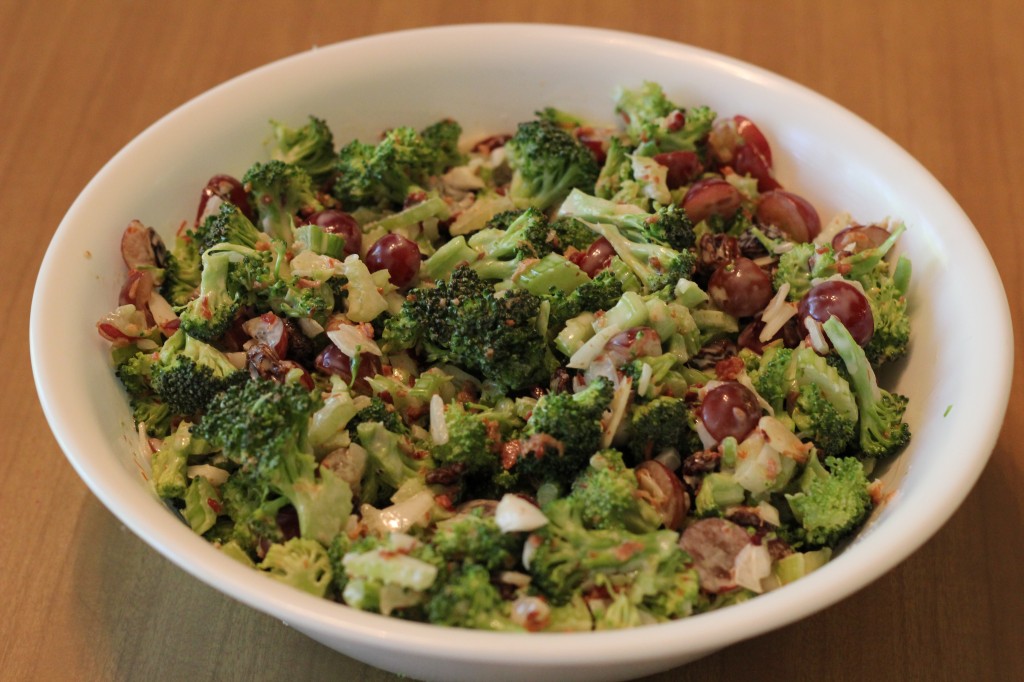
Toss all the salad ingredients together in a big bowl. Then combine the dressing ingredients in a separate bowls. Combine salad with dressing. Refrigerate.

How to make it (step-by-step):

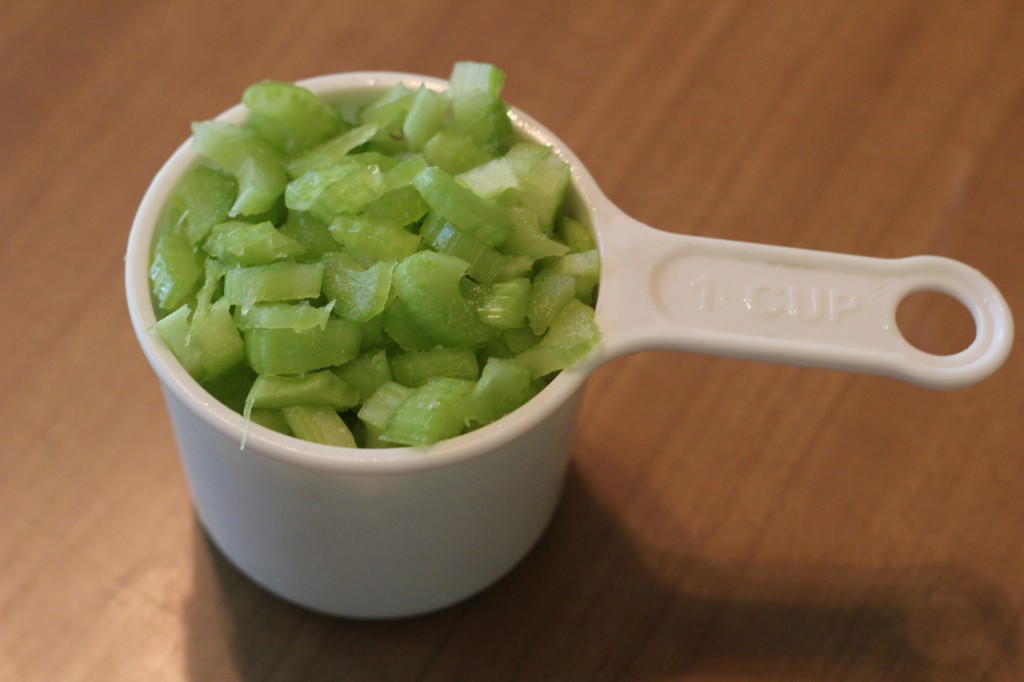
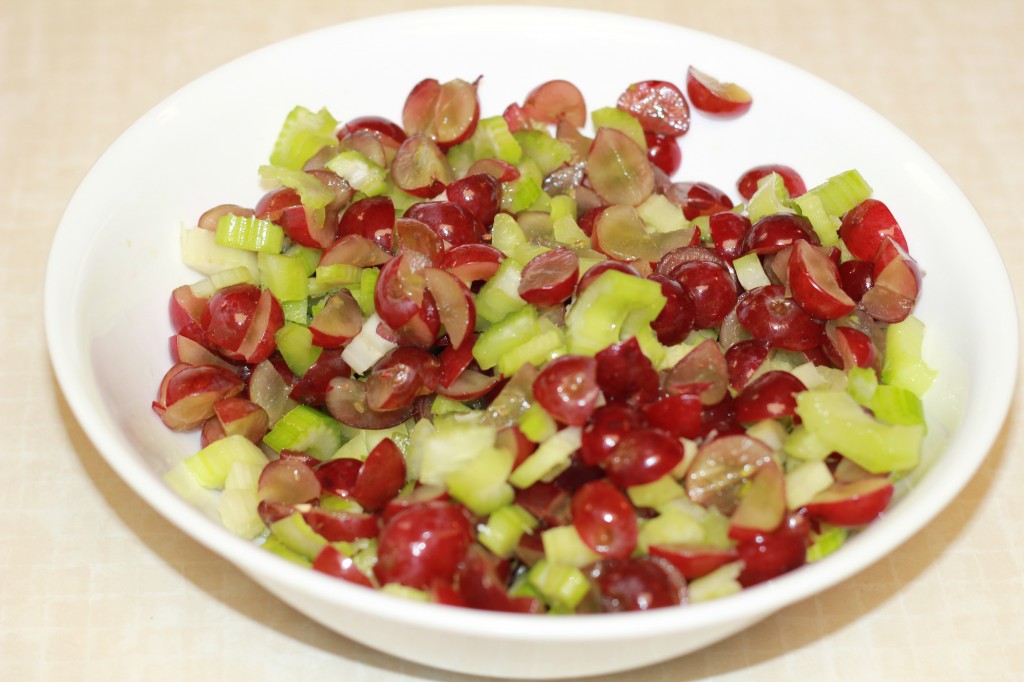
Cut your grapes in half (or in fourths) and put in a big salad bowl.

how many grapes for broccoli salad

 Then chop your celery and add it to the mix.

how much celery does broccoli salad call for

broccoli grape salad

You can add a little more broccoli than it calls for if you like. I think it’s better with more broccoli. I like to cut off all the stems and just use the tops. Cut them into little sections (not too big, but they don’t have to be itsy bitsy – unless that’s how you like it).

how much broccoli is one headchopped broccoli salad


Then add your raisins (and sunflower seeds if desired) . . . If you decide not to use sunflower seeds, I would add a little more of the other ingredients so that there’s not too much dressing.
broccoli raisin salad

broccoli salad with bacon bits


I’ve never tried it by making bacon from scratch. I’m sure it would be good. I usually just get the “real bacon bits” 3 oz. jar. Sometimes when I’m trying to make it healthier, I’ll just use half the jar and it’s just enough to give it the bacon flavor.  But when I’m just trying to make it extra yummy, I’ll use the whole jar.

Mix all together with the dressing, and then chill for an hour (if you have time – it’s not essential). And now it’s ready to eat! Yum!

how to make broccoli bacon salad


Jun 16

Filipino Lumpia Recipe! WAY Better Than Egg Rolls

Here’s the recipe for lumpia, my all-time favorite Filipino food.  If you’re an egg roll lover, you have to try lumpia! I learned how to make lumpia while serving my mission in the Philippines. Once I tasted it, I was converted. They are a lot crisper than egg rolls because lumpia wrappers are a lot thinner than egg roll wrappers. You can make it lots of different ways – most of the time it’s made with mostly meat (usually pork). I prefer making it with more veggies, so I just experimented with the ingredients and came up with this recipe. I hope you enjoy it. Everyone I’ve made it for has loved it.

egg roll substitute

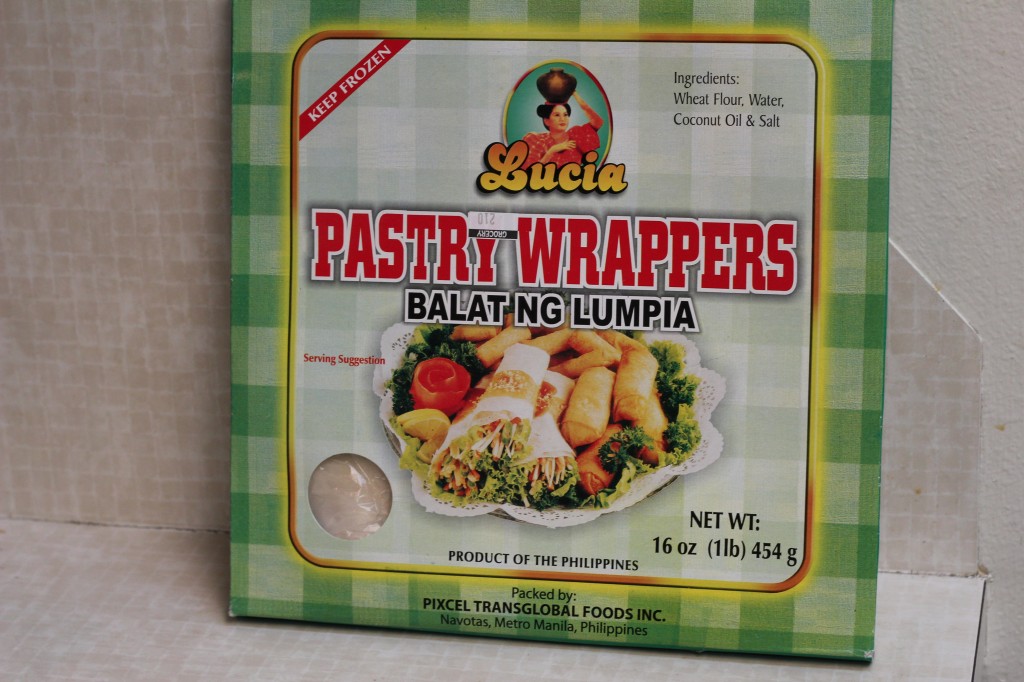
First, you need to go get lumpia wrappers. They are available at many Asian markets, usually in the frozen section. Make sure you don’t get spring roll wrappers – they are not the same thing! The package should say something like “Balat ng Lumpia.”

Let them thaw in the fridge. Once completely thawed, you should be able to pull them apart. Be careful not to rip them as you peel them apart. They come stuck together in very thin sheets, but if you are gentle and work at it for a bit, they should all peel apart nicely.

Recipe for the lumpia filling:

1 small-ish onion, chopped
1 cup carrots, shredded
1 package coleslaw 
1/2 lb. shredded chicken (or 1 can tuna)
1 egg
Garlic powder to taste (I’d do at least 3-4 cloves worth)
Salt & Pepper to taste (1/2 teaspoon-ish)

Mix all ingredients together. I find that if you mix it up a few hours beforehand and let it sit covered in the fridge, the flavors seem to soak in better (but I don’t always do that).

You can also use Lumpia Shanghai seasoning mix in place of the  garlic, salt, and pepper. It’s available at many Filipino stores. I like to use the seasoning packet when I can but the other does the trick too. The amounts are approximate – it doesn’t matter too much if you put a little more or less of something than it says here. I often vary the amount of carrots/onions/chicken that I put in, and I can’t tell the difference.

How to wrap the lumpia:

putting the filling inside lumpia pastries

Put a line of filling down the middle. You can put as much or as little as you want – whatever you prefer. (true Filipino lumpia is pretty small & tightly wrapped, but I sometimes like making mine a little bigger). Fold the edges over perpendicular to the line of filling on both sides (this will keep the filling from falling out). Then fold one side over and roll it as tight as you can without ripping it.  After wrapping it, dip your fingers in a cup of water to wet down the edges and seal them together. Hopefully that makes sense. I’ll try get a couple more photos next time I make it in order to show it more step-by-step.


lumpia before it is fried

Make sure your oil is hot enough (click here for a cool trick for this!) and deep-fry. Serve with rice along with other Filipino dishes or as a party finger food. Dip in soy sauce or sweet & sour sauce. Enjoy!

best filipino food ever


my favorite filipino recipe

If you have any questions, feel free to leave a comment!

Check back later – I plan to post how to make Filipino banana lumpia for dessert, as well as other yummy Filipino recipes!

Jun 06

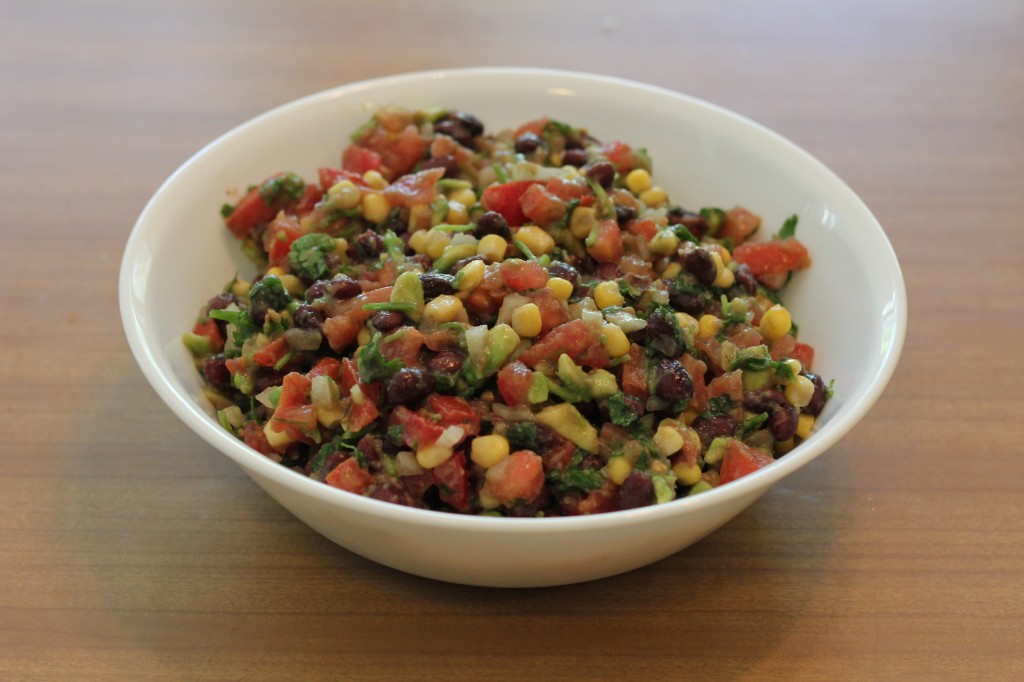
The Best Black Bean Salsa Ever!

delicious black bean salsa recipe

Here’s a recipe for one of my favorite summer snacks: black bean salsa. I got this from Alex’s mom. It is yummy enough to share and very easy and simple to make.

 Ingredients:

3-4 large tomatoes, chopped

2 cans black beans, drained

1 can corn, drained

1 small onion, chopped into small pieces

1 bunch fresh cilantro, chopped

1 large avocado, chopped

Lime juice and garlic powder to taste

Mix all together and eat with corn chips.

Just a side note: So when I made it, I served it for dinner with tortilla chips along with some tomato soup. Grandma decided to put it in her soup, which is something I never even considered doing. But come to discover, it’s actually a really good combination!


Jun 06

A Scriptural Insight from The Book of Mormon

Jesus in the Book of Mormon

One of my all-time favorite scriptures in the Book of Mormon is 3 Nephi 19:2-3:

And it was noised abroad among the people immediately, before it was yet dark, that the multitude had seen Jesus, and that he had ministered unto them, and that he would also show himself on the morrow unto the multitude.

Yea, and even all the night it was noised abroad concerning Jesus; and insomuch did they send forth unto the people that there were many, yea, an exceedingly great number, did labor exceedingly all that night, that they might be on the morrow in the place where Jesus should show himself unto the multitude.

I came to love this scripture on my mission! The people stayed up all night long, gathering their family and friends and working to get everything done so they all could attend this great event that was about to take place.  It even says that they “labored exceedingly,” so that they could be there first thing in the morning, ready to be taught at the feet of the Savior. These people wanted to be there so badly that they were willing to sacrifice their sleep and energy so that they could make sure to be available at the appointed time.

We make sacrifices like this all the time to be where we really want to be. What are some of the things in our culture that are common for people to be willing to stay up at night or sacrifice the equivalent of their time and energy for? Here’s a few I thought of:

  • To be at the opening night of a new movie that everyone is raving about.
  • To get the best seat possible at a sports game, parade, etc.
  • To get a 10-page research final paper finished, so we can turn it in on time to our class.
  • To get a front row seat at a concert of our favorite music artist or celebrity who is touring the city.
Painting by Doc Christensen

Painting by Doc Christensen

The Lord expects us to be where He expects us to be.

I’m sure if the Savior were coming tomorrow, that would be the talk of the town. And every one of us would do anything to be there.  We wouldn’t miss it for the world.

But what about the less obvious ways when we have the opportunity to be taught at his feet? How about church? Are we willing to make those same sacrifices in order to make sure we are able to attend and fully participate in church, to partake of His sacrament, and be taught by those whom He has called to teach us? I love the painting above because it makes me realize that every time we partake of the sacrament at church, we are being ministered to by the Savior himself. He’s the one who instigated it and it is done under the authority of His priesthood. He is there.

How desirous am I to read His words in the scriptures? Am I willing to sacrifice to gain access to that? I think of William Tyndale and all those who sacrificed so much to make the scriptures available to us. Does reading Christ’s written word matter to me just as much as hearing his spoken word was to the people back then? Is it any different?

Excited about seminary

What about early morning seminary, or institute? Are we willing to do anything necessary to make sure we are able to be there, bright and early, rain or shine? To learn about and grow closer to Christ through these inspired programs? He is there.
general conferenceGeneral conference comes to mind. How important is that to us?  Do we jump at the chance to rearrange our schedules and put in some extra work in the days and nights before so that we can be free to listen to the counsel of our living prophets without distraction?  Surely, He is there. The Savior may not be physically present before our eyes at church, or at general conference, stake conference, or in seminary, etc. etc. etc. But knowing what we know – that He is the head of this church and that He has called servants to teach us, it really isn’t any different than if he were there in person. “Whether by mine own voice, or by the voice of my servants, it is the same,” He said. Whenever I read these verses, I ask myself, “Am I as excited and motivated as the people in this chapter were to be taught at the feet of the Savior?”

*                             *                              *                             *

I think it’s also interesting to note that later on in this same chapter, when the people arrive early in the morning, all ready and eager to be taught by Christ, He actually doesn’t appear to them immediately. But that doesn’t shake their faith. Instead, the people divide themselves into groups and are taught by the 12 disciples whom Christ had called the day before. Later on, because of their faith, Jesus himself appears to them, and they end up sharing with Him one of the most sacred experiences recorded in scripture.

I think this teaches a true principle. Sometimes we have to first show our faith in the smaller things before Heavenly Father will give us greater blessings we seek for. How do we show our faith? By being willing to sacrifice, such as being willing to “labor exceedingly” all through the night (or whatever sacrifice is required of us) in order to attend church, watch general conference, or be where he expects us to be. After we exercise faith in following His servants, He will open the windows of heaven and pour out more blessings than we ever could have dreamed of, and in due time, we will be able to see His face and know that He is.

Excited about the gospel

Photo from LDS.org

(Other photos by Mormon Newsroom)

Jun 05

Family Movie Night: How to Avoid Unpleasant Surprises

see no evil hear no evil speak no evil

Wouldn’t it be nice if movies were always as family-friendly as their ratings claim them to be? Unfortunately, movie ratings don’t always tell us everything we’d like to know when selecting appropriate media for our families. Most of us have had an experience when we are excited to see a new movie. Both the rating and the trailer seem appropriate and so we assume it to be a wholesome family film. But then while watching it, we become disappointed at an unnecessary inappropriate scene that seemed to come out of the blue, or shocked by language or themes that we didn’t expect to be in there. As parents who are trying our best to guard our children against the impact of harmful media, this is the last thing we need.

parental media filters

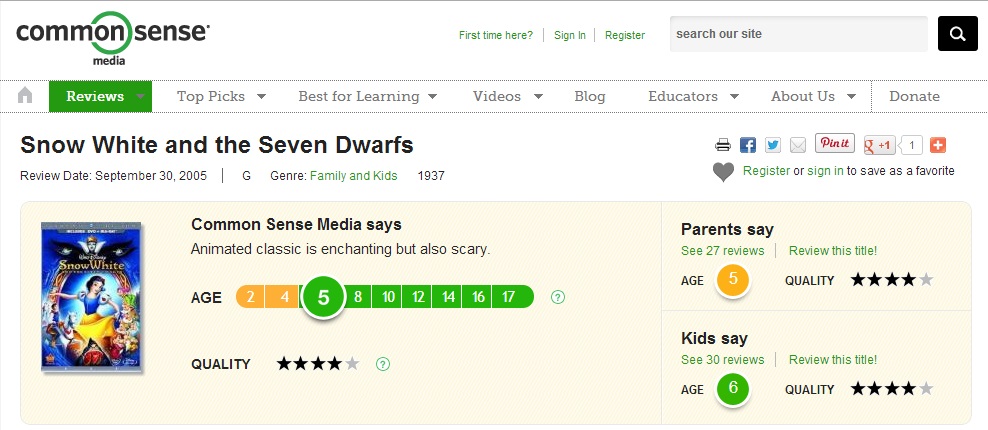
Luckily, there are some great tools available that can help us become more informed in what media we choose to consume. About a year ago, I learned about a wonderful resource called CommonSenseMedia.org. It has now become my favorite go-to place for finding out everything I should know before deciding if I really want to see a certain movie.

movie rating review

There is a “What Parents Need to Know” section that gives a review explaining some themes and specific content to consider when deciding whether or not to allow that movie in their home. There is also a section where other parents and kids can contribute their own reviews of the movie. For newer releases, the website provides short video clips with review commentary.


what parents need to know

However, the most helpful part of this resource, in my opinion, are the details it provides regarding the actual movie content. Common Sense Media goes above and beyond the simple rating system by actually outlining for you the specific items of concern. They give a 1-5 star rating for how much violence, sex, language, consumerism, and substance use there is in the film as well as giving ratings for positive messages and role models. You can actually hover over these items to see an expanded list of every act under each of those categories that merits the rating. No more unpleasant surprises!

what's behind the rating

Another awesome feature – Common Sense Media isn’t just for movies. It also provides helpful content reviews for books, TV shows,  websites, apps, video games, and songs. How great is that? Now parents can be in-the-know regarding all types of media their children consume.

While each has the potential of providing wholesome entertainment, so much of what has been produced for our listening and watching pleasure is not of the caliber to inspire and encourage young men [and women]. In fact, most of what is produced is degrading. The flip of a switch right in your own home has the potential of destroying within you a sense of what is right and what is wrong” (Elder L. Tom Perry)

Common Sense Media can be a wonderful blessing for parents who are concerned about protecting their families from harmful media, but it shouldn’t be considered the ultimate source of all truth. For instance, I’ve noticed that their reviews don’t always take into account some of the more subtle messages & underlying themes (which I believe can be just as harmful). But it’s a lot better than relying on the movie ratings themselves. In the end, prayer and following the spirit should always be our ultimate guide in making media decisions, but Common Sense Media can be a great help.

I highly recommend using Common Sense Media and believe it to be a valuable resource for families. Each time I use it, I feel empowered. I love the control it gives me over my media choices. Hooray for no more unpleasant surprises!


___________________________________________________

UPDATE:  Since I wrote this article, I’ve become aware of something you should know. Apparently CommonSenseMedia does NOT include instances of ‘taking the Lord’s name in vain’ under profanity. As a Christian I’m more bothered by this than by other types of swearing, but I guess they don’t consider blasphemy a form of profanity, so keep that in mind!

Also, I’ve become aware of an awesome resource that I think everyone should know about!  VidAngel.com. I’ll probably write a post on it one of these days. You can rent movies online for only a dollar and they have tons of filters you can use to omit potentially inappropriate parts (including taking the Lord’s name in vain, and lots of other potentially offensive things). So awesome!!  

Jun 03

Creative Toppings for Muffin-style German Pancakes!

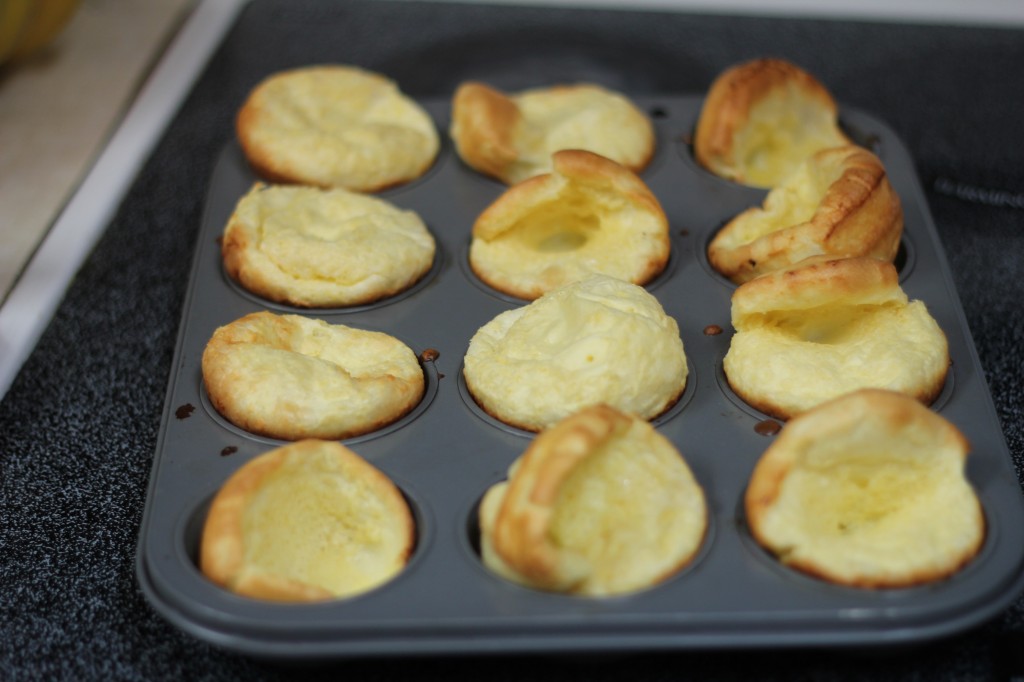
What can you do with German pancakes? When you do it muffin-style, it comes out with a nice little pocket where you can put all sorts of creative fillers. Here’s a couple ideas for some yummy toppings, some you probably haven’t even considered.

Fresh fruit!

  • Raspberries
  • Peaches
  • Strawberries
  • Bananas

(You could even do it crepe style and add vanilla pudding, Nutella, toasted coconut, almonds, and whipped cream!)

Greek Yogurt!

  • I tried stuffing the muffins with Greek Yogurt, and it was a winner. This was the first time I had ever used Greek Yogurt (it was on sell at WinCo, so I thought I’d get some for the experience – it’s usually super expensive). It was super yummy! I prefer just using plain – the vanilla is a little too sweet for my taste. If you drizzled a little bit of maple syrup over it and put mixed berries on top, it comes out just the right sweetness! I’ll definitely be doing this again.

German pancake toppingsGerman pancake toppings


Chicken salad bites!

  • German Pancakes for lunch? Why not? The idea just popped into my head one day, so I tried it out for lunch and it totally worked! They are light and fluffy and so it tastes kinda similar to crescents, just a bit more eggy and a tad heavier. I loved it! I whipped up some chicken salad and spooned some in the middle and wala! Now I do this with all my German pancake leftovers for lunch. Just warm them up in the microwave and you’re set. Next time I want to try it with egg salad. And I bet seafood salad would be yummy with it too.

chicken salad in german pancakes
If anyone have any other ideas for creative fillings, let me know!


May 28

How to Tell if Your Oil is Hot Enough

Popcorn kernal frying trick


How do you know when your oil is hot enough for frying? When making scones, Navajo tacos, or anything deep-fried, I was in the dark. I’d usually just flick some water and see if it sizzled or drop in a tiny piece of dough to see if the oil was hot enough. Not anymore! Last night, I went home to cook some yummy Filipino Lumpia, and my mom showed me this cool trick she came across recently for determining when the oil is ready. Popcorn kernels! Just put a kernel in the oil and turn on the heat. When the oil is hot enough, the kernel will pop and you’ll know it’s ready for frying. Duh! Why didn’t I think of this before? Apparently, popcorn pops at 300F degrees , which is the same temperature that is recommended for deep-frying. Anyway, I thought it was very clever and will be doing this every time now.

*Extra tip: Just don’t forget to take out the popped kernel before frying anything. I didn’t think to do that and it it got all over the food 🙂

Also, I’ve decided I like to put in 2-3 kernels instead of just 1, so that I can test the heat in different parts of the pan.


May 27

Going To School With a Baby: 23 Tips to Make it Easier

100_6159

Here’s some ideas for how to make going to school with a baby easier, while putting your baby first. There are various reasons a mom may need to balance school and motherhood responsibilities, and there’s no perfect way to go about it. But in writing this, the underlying assumption is that motherhood is the highest priority, not school. As a Latter-day Saint Mommy, I’ve tried to write these tips from the perspective of putting everything we do outside the home in subjection to and in support of what happens inside our home, not the other way around, as counter-cultural as it may be. After all, “the most important … work [we] will ever do will be within the walls of [our] own homes” (Harold B. Lee) and “no other success can compensate for failure in the home” (David O. McKay). Or, as one blogger wrote, motherhood “is not something to do if you can squeeze the time in. It is what God gave you time for.” Love that!

Since every circumstance is different, I’m not saying that all of these ideas will work for everyone, but these are just some things that have worked for me that I felt were worth sharing. This list is simply meant to be a springboard for ideas of your own, and I hope you can find some of these insights helpful! Doing school with a baby can be a challenge, but with a little prayer, planning, and determination, it can be possible to do it without sacrificing your most important calling in life.

Feel free to let me know if you have any other ideas to add to this list!


23 Tips to Make Going to School with a Baby Easier:


  1. Read your textbooks before the semester starts. I took off the semester my baby was born and had lots of down-time those first few months (nursing him constantly), so I took advantage of the time to get a head-start. This makes life SO much easier when the semester actually starts because you’ve done a lot of the work already.
  2. Bring your baby to class with you.  Sit on back row near the exit. Find classes with a format that can work with this strategy. Classes based on lots of group work, presentations, or in-class quizzes may not be the best choice. Instead, look for classes based mostly on individual study. Also, consider the actual classroom environment. Classrooms with exit doors in the back are best, so that you can easily slip out if needed without distracting the class. You might also consider bigger classes held in larger classrooms, where it’s less likely you’ll stand out. Larger schools may have more class options and sections to choose from.baby_monitors (1)
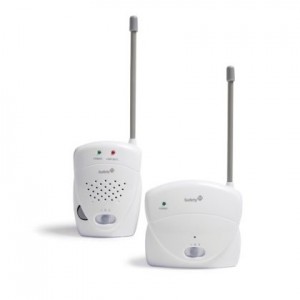
  3. Use a baby monitor to listen into class lecture.  

    This allows you to sit outside the classroom in the hall where your baby can crawl around, play, coo, and make noise. You can focus on him while still listening to the lecture in the background. Ýou’ll need to get permission from your teacher to do this. All of my teachers were very willing to let me try this out. When I did this, students passing by would often stop and ask, “Are you listening to class lecture with that? That is brilliant!” or “Why didn’t I think of that?”

    The only down-side to this is that if another class gets out early and the hall gets super noisy, you may not be able to hear as well. That wasn’t a huge issue for me most of time though, and there are solutions to things like that. For example, you could find an empty classroom nearby to sit in instead of out in the hall. Also, I think the type of baby monitor you use could make a big difference. I just used the regular cheap kind, and it worked OK for my purposes. However, you might like to invest in a more expensive one, which can have some nice perks. Video baby monitors, for instance, might be useful if the class is built around a lot of visual stuff like Powerpoints. Some baby monitors might also have a farther range (the cheap ones wouldn’t reach very far, so I’d have to stay right outside the classroom the whole time. It would have been nice if it could reach to the nearest mother’s lounge, so I could just hang out in there the whole time).  I’ve heard that there might be baby monitors that you can access from your iPhone, which would be really nice. Then you might be able to listen in from anywhere. Has anyone looked into this? I’d be interested to know!

  4. Use Skype.  It comes in clearer than a baby monitor (at least the cheapo ones) and you can listen in from home!  I actually used Google Hangout for this. The only thing is, it requires someone on the other end. My husband (bless his heart) sat in on quite a few of my classes for me while I listened in through Google Hangout. It worked great for us since he works from home, so he was able to just sit in the back row and get his online work done while I was at home, rocking my baby and listening in to lecture. Occasionally we’d lose connection and have to open it up again – I think it has a lot to do with how good of an internet connection you have. (Don’t forget to mute the sound on the other computer!) We actually experimented leaving a laptop in the classroom with Google Hangout open, but it shut off after about 30 minutes, so I guess you definitely do need someone on the other end. But hey! Good excuse to make a friend in class!
  5. Breastfeed.  If at all possible, breastfeed! You can do it anywhere, and it’s less of a hassle than having to wash bottles and mix up formula every time. It frees up your hands so you can type and do homework instead of holding a bottle while feeding. Breastfeeding can be a hassle in the first few weeks, but so worth it in the long run if you stick with it. It’s not only  good for the baby’s health but also for your sanity, especially if you are planning to go to school. If you’re having trouble breastfeeding, get an appointment with a nursing consultant. It is worth the time and money and will simplify your life immensely.
  6. If at all possible, don’t try to go to school until your baby is at least 2 months old.  Brand-new babies are more susceptible to illness, which can spread easily in a school setting, and you don’t want to be bringing home anything contagious to your baby. Also, you need the recovery time and also time to adjust to and get to know this new little one without jumping into classes just yet. School will be a lot easier on you after settling into a pattern so you know more or less what to expect with your baby. Most importantly, these first two months are crucial for establishing breastfeeding. High stress levels and rigid schedules during this time could greatly interfere with your ability to successfully establish breastfeeding. Check to see if your college allows you to take a semester break. If this is an option, then by all means, take it!
  7. Take advantage of the time when your baby is still immobile.  This is also the time when babies tend to sleep/nurse most of the time. Once your baby starts to crawl everywhere, it might be harder to do school with a baby because you’re always having to chase them around. It’s also harder to take a baby to class with you as you might be able to with a younger baby. But though it limits your options, you can still make it work if you are creative.
  8. Google docs are your friend.  Use them! If you have a friend in class who is willing to take notes for you, Google docs can be a great tool. The nice thing about this is that you can communicate with them instantly while they are taking notes. If you have a question or you don’t think you heard something quite right through the monitor/Skype (if you’re also using one of those methods), you can ask them right then during the lecture while it’s fresh on both of your minds. If you have a question for the teacher too, you can ask your note-taker to ask the question for you. Trying to take notes with a baby in your arms in sort of a joke, so if your class is heavy on note-taking, Google docs can make life so much easier. Some classes like to collaborate everyone’s notes for the final exam through Google docs, which can be very helpful as well.
  9. Talk to your teachers.  Get to know your professors long before the semester starts. Let them know about your situation and present to them your plan of attack. Many professors are willing to work with you, especially if you take responsibility to plan ahead and contact them early. If possible, ask for a copy of the syllabus so that you can know what to expect before the first day of class.
  10. If needed, consider changing to a more family-friendly school.  I go to BYU (privately-owned church school). Because of their family-first mentality, the campus environment is very accommodating for student moms with kids. There are changing tables and mother’s lounges in many of the restrooms (which makes life much easier), and for the most part the teachers are very understanding and willing to work with you. There are also plenty of other students who have already started their families, so you won’t stand out as much as you might at other colleges.
  11. RateMyProfessors.com is a great resource.  Often the biggest thing to consider when choosing which classes to take is the teacher. Looking up your professor’s name on RateMyProfessors.com can help you get a feel for the different teaching styles and how the class is structured. This can be a great way of sifting through your options before committing to a class and contacting the teacher about your situation. For example, some teachers put up all their Powerpoints online while others expect students to scramble to write notes. While neither teaching strategy is bad, some may be a better fit for your situation than others. While not everything you read in the ratings may turn out to be true, it’s nice to have an idea of what you are in for rather than getting hit by an unpleasant surprise halfway through the semester. Just take the reviews in the spirit that they were given and then contact the teacher to see for yourself whether or not his/her class will work for you.
  12. Consider changing your major or dropping unnecessary minors.  Put simply, some fields of study are just less realistic with a baby. Explore all the options and keep an open mind. Remember, sometimes there is more than one way to achieve a desired goal. Think outside the box. Could you gain the same skills by going another route? Could studying on your own or watching online tutorials do the same thing for you? Decide to do without some of the extra ‘frills’ of a college experience and just focus on the absolute requirements to reach your desired destination.
  13. Get internships done early.  Many majors require some sort of internship. If you already know that you will be starting a family before finishing your schooling, try to get any internships or in-field work out of the way early so that you won’t have to worry about those requirements after having a baby. If you are lucky enough to feel well enough during your pregnancy, take advantage of that time to do your internship before the baby comes, as it will be so much easier to do that type of work before having to care for a baby who needs your constant attention.
  14. Nurse in class.  It’s a great way to keep your baby happy and let you focus fully on the lecture.  Using a baby carrier can make it easier to nurse discreetly and be hands-free. If you’re completely covered and learn to do it discreetly in public, no one should care.
  15. Take advantage of down-time.  Read and do your homework while your baby is nursing or taking a nap, so that when baby is awake, you can focus 100% on being a mommy without distractions.
  16. Consider not taking a full load.  Especially if you don’t have much family support or resources available to you. If you are eligible for financial aid, often it can be pro-rated so that you can focus on less classes at a time. That being said, there may be cases when taking a full load is actually less stressful than spreading it out over a few years. The older your baby gets, the more challenging it may be. Consider your own situation, pray about it, and go forward with what you feel is best. Consider waiting a few years to finish school if you have a baby whose personality/needs aren’t conducive to the demands that would be placed on you at school. You are first and foremost a mother.
  17. Take Independent study courses. If the classes you need to take are available through independent study, this can be a great option for stay-at-home moms.  I don’t know what independent study options there are at other schools, but at BYU, there’s quite a few classes available for home study. And you have up to a year to complete each course, which is nice. The classes cost extra tuition though, so you have to have the resources to make it work. This may be more realistic if you only have a few classes left.
  18. Accept help from friends and family.  Get a babysitter when you need to, but try not to overdo it. Remember, no one can replace mom.
  19. Try to get baby to sleep before class.  Ha! In a perfect world, this would always work. Granted, my baby sleeps less than most, but I found this very difficult to do. But props to you if you can 🙂
  20. Skip Class.  Decide where your time is best spent. If there is no attendance policy, consider staying home instead of going to class. Less hassle trying to get out the door and you don’t have to stay on a schedule. It depends on the class, but if the curriculum is textbook-heavy, sometimes reading and studying on your own, you can learn what you need to in order to get by just fine.
  21. Practice typing with one hand.  Because you’ll be doing it a lot. Get used to doing a lot of things with one hand and get ready to become a master of juggling and multitasking.
  22. Stay calm.  Don’t let yourself get too stressed out. Babies pick up on stress. And then you’ve got a crying baby whose crying makes you even more stressed out, which makes the baby even more distressed. It’s a vicious cycle. Do something to keep you relaxed every day. For me, it’s reading scriptures. Everything seems to go better when I pray and read scriptures in the morning.
  23. Lower your expectations.  Be OK with not being a perfect student. There is a time and season to everything, so prioritize. Make sure you are giving an A+ effort to being a mom and then use your leftover energy/time to do the best you can in your classes, but don’t pull your hair out if you can’t do as well in your studies as you used to. It’s OK as long as you are excelling in the area of your life that matters most. When I started going to school with my son, I made a commitment to do my best to always put his needs first before schoolwork and grades, even if it meant I’d fail a class. Thankfully I was able to get by just fine, but I’ve never regretted that decision. Raising a child is way more important than earning a diploma in the eternal scheme of things.

Good luck! You can do it! I’d love to hear any other ideas that anyone else has.

May 24

Once You’ve Tried German Pancakes Muffin-style, You’ll Never Go Back

IMG_0475Recently I discovered the awesomeness of German pancakes muffin-style! I’ll never go back. Here’s why:

  • Easier clean-up – Less middle surface area makes it less likely to stick to the pan (at least that’s been my experience).
  • Easier to serve – You don’t have to cut it. It’s already in individual pieces for the everyone to help themselves.
  • Easier to eat – A finger food that’s great for parties, camping, and when you have feed the kids on the go.
  • You can do so much more with it – Each muffin forms a nice little pouch that can hold all sorts of creative fillings – while still keeping it a finger food (click here for creative ideas for toppings!)
  • And best of all, no more fighting over who gets the yummy edge pieces because every piece has edges now!

So here’s the recipe!

German Pancakes Muffin-Style

Makes 24 regular sized muffins.
*I don’t have 2 regular muffin pans, so I used 1 regular muffin pan (12) and 1 large muffin pan (6).

What you’ll need:

6 eggs
1 cup flour (I’ve tried using whole wheat flour to make it healthier but it doesn’t turn out quite as good).
1 cup milk
1 Tbsp. sugar
1/2 teaspoon salt
1/2 stick butter

2 muffin pans

Directions:

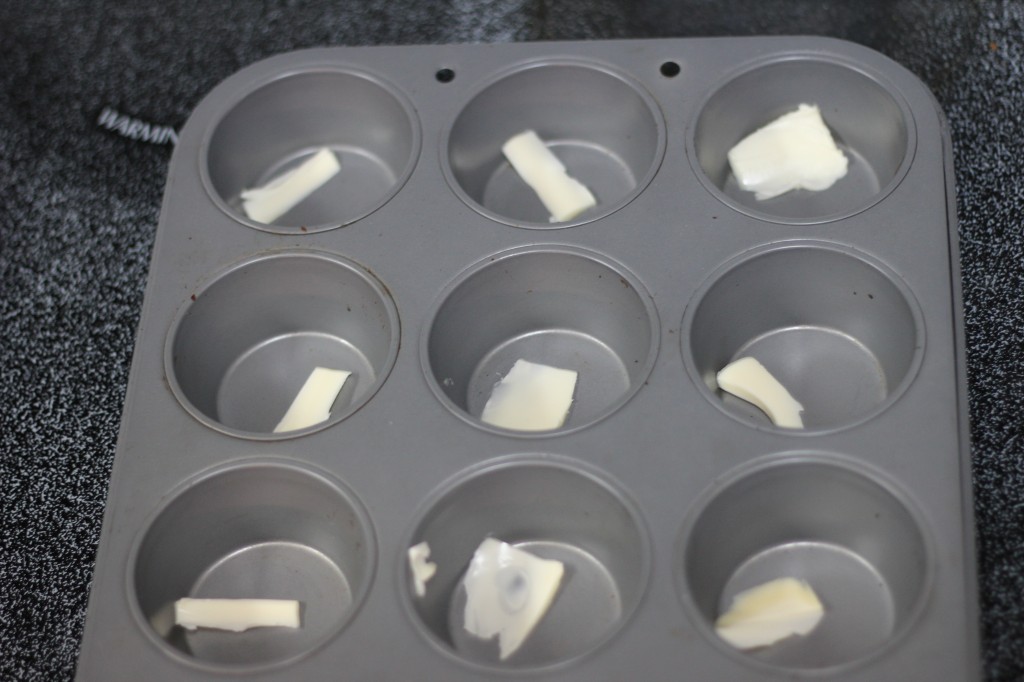
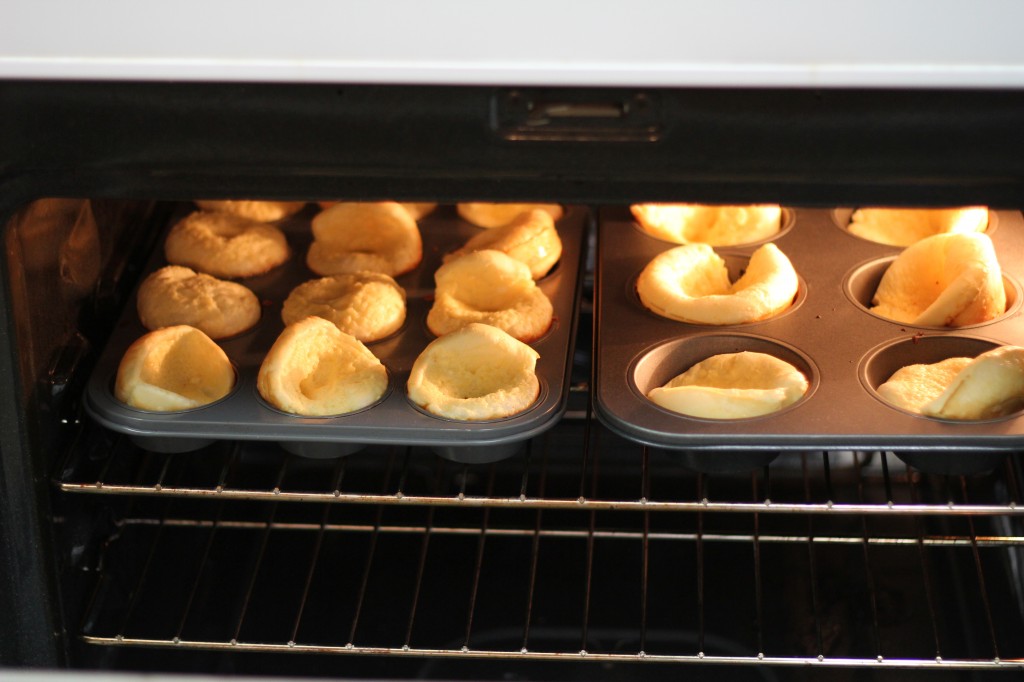
Preheat the oven to 375 degrees. In a bowl, beat together all the ingredients except for the butter. Slice the butter and evenly disperse between the muffin pans, as shown in the picture below. Put the pans in for a couple minutes while it’s preheating to melt the butter, then pour some batter into each compartment in the muffin pans until each muffin compartment has amount the same amount. Cook for about 10-15 minutes, or until it is golden brown, or as dark as you like it. Also, bear in mind that the muffins will rise substantially, so make sure your rack isn’t too high (I’ve made that mistake before). I also wouldn’t recommend trying this in a toaster oven.


IMG_0471

That’s all – Easy as cake! Then once it’s done, bring it out and eat to your heart’s delight!

IMG_0474


May 21

Receiving Personal Revelation

instantly [social_share/]

“Each of us must stay in condition to respond to inspiration and the promptings of the Holy Ghost. The Lord has a way of pouring pure intelligence into our minds to prompt us, to guide us, to teach us, and to warn us. Each son or daughter of God can know the things they need to know instantly. Learn to receive and act on inspiration and revelation” (Boyd K. Packer)

(Find me on Google Plus)

May 12

Easy Crockpot Honey Garlic Chicken


IMG_03861


I found this recipe for easy crockpot “Honey Garlic Chicken” on Pinterest and thought I’d try it out since it didn’t require me to go out of my way to buy any obscure ingredients that I don’t normally have. Just Soy sauce, honey, and ketchup! It turned out great. Here’s the recipe:


3 boneless, skinless chicken breasts
3 garlic cloves, chopped (Too much work – I just used the equivalent of garlic powder and it turned out great)
1/2 c soy sauce
1/2 c ketchup
1/2 c honey
pinch of basil (The original recipe calls for fresh basil but I don’t think it’s necessary. Dried basil does the trick!)
salt & pepper to taste
Cornstarch 
(Original recipe says to simmer the sauce separately in the crockpot until it gets thicker, but I prefer just adding cornstarch)
 
Slice each of your chicken breasts in half and place in bottom of crock pot. Mix garlic, soy sauce, ketchup, honey, basil, salt, and pepper in a bowl and stir.

Cook on low for 4-6 hours or on high for 2-3 hours (Cooking times may vary – I’d check it after a couple of hours and then adjust the cooking time/temp – I used frozen chicken and put it on high for a few hours and it seemed like it cooked just as fast almost as non-frozen chicken). Remove chicken from crock pot and transfer to covered plate to keep warm. Add a little cornstarch to the sauce in the pot until thickened to desired consistency. Put the chicken back in and serve over rice. It has a taste somewhat similar to BBQ chicken. Very tasty! I’ll be making this one again since it’s super duper easy and calls for ingredients I usually already have on hand.


May 10

The Prettiest Song Ever!

My husband ran across this on Youtube. If you’ve ever seen the movie 17 Miracles (if you haven’t you need to!) it’s the song at the end of the movie. The thing I like about it is that you can tell that the singer is personally invested in the message of the song. He’s not just performing. He’s trying to convey something deeply important to him. When I listen to this song, I feel a strong desire to consecrate my life to the gospel of Jesus Christ. What could possibly be more important?


May 10

How To Make a Baby Graduation Cap and Gown

How to sew a Baby Cap and Gown

Here’s a tutorial about how to sew a baby graduation cap and gown!

The Finished Product: 
As you can see, the cap and gown turned out darling, and the little graduate looked very cute.
We simply overlapped the flaps in front, but a safety pin would have held it down better.

Baby Cap and Gown

All right, here you go!

How to sew a baby cap and Gown:

(My mom gets all the credit for this. I wanted to do this but I’m cheap – I was originally going to attempt to do a make-shift cap and gown out of an old blue onesie and T-shirt. She thought we could do better than that, however, and took it upon herself to make the magic happen). It turned out super adorable! Here are the detailed instructions she gave me:

I bought 2 yards of dark blue washable satin fabric, although basic broadcloth would have worked as well, but wouldn’t have the shine. I didn’t use it all (I might have had a quarter or half yard left). I just wanted to make sure I had enough, since I didn’t have a pattern and needed to allow for mistakes. A pattern would have made it a lot easier, but it worked out.
I also bought very thin elastic for the cap.


HOW TO MAKE THE GOWN:

Graduation Gown Pattern

  1. I placed one of the baby’s sleepers over the fabric so I would know how long to make it. I allowed a little extra length.  Then I cut it into a square as shown.

Gown 22. Then I determined the width of the gown by folding each side so that one side overlapped the other. The two overlapping flaps on top would become the front of the gown. The part underneath would become the back.

Gown 3

3. Then I put the sleeper over the folded fabric to make sure the width was what I wanted. I wanted it to be loose.

Gown 4

4. Then I used the sleeper to help me determine where to cut the sleeve holes.

Gown 5

5. I cut the sleeve holes on both folded edges similar to how you would with a pattern.

Gown 6

6. This shows how much overlap there was in the fabric. I wanted this much extra so I could create pleats or other decorative edge on the front.

Gown 7

7. Next, I folded over some of the extra fabric for sleeves. Then I laid the sleeper sleeve over the folded fabric and cut it to the length I wanted.

Gown 8a Gown 8b

8. Then I cut the sleeves to the desired width so it was slightly wider at the top (6 inches) than at the bottom (5 inches). The length was over 11 inches, but that was too long, so I would probably do 8 inches.  I sewed the side seams on each sleeve.

Gown 9

9. Then I cut the curves on the top of the sleeves the way they look in sleeve patterns. I then stitched a loose gather stitch on the upper edge and adjusted the gather to fit the sleeve opening.

Gown 10

10. Then I sewed the sleeves to the gown. You can see the amount of extra fabric I still had to work with in the front.

Gown 11

11. This picture is a bit fuzzy, but shows the gown after I sewed on the sleeves, but before I finished the edges and front. Then I hemmed the neckline and front edges down to the bottom.

Gown 12

12. I decided to make a V-neck that overlapped. To do this I simply folded both edges of the front diagonally and pinned it, as shown in this picture. Then I topstitched the diagonal edges and hemmed the bottom edge. After putting it on the baby I determined how long the sleeves should be and cut off the extra length at the bottom and then hemmed the sleeves.


HOW TO MAKE THE CAP:

Cap 1

1. I cut an 8-inch cardboard square from a box and laid it on the fabric. Then I cut a square of fabric large enough so the edges would meet in the center when folded over the cardboard.

Cap 2

2. Then I folded the fabric over the cardboard and glued it down with a glue gun the way it shows in the picture.

Cap 3

3. To make the button I cut out a small circle from the cardboard and cut the fabric in a circle just larger than the cardboard. Then I glued it down as shown in the picture.

Cap 4

4. To make the tassel I used braided gold trim and untwisted the ends for the tassel. I glued it to the bottom of the button and then glued the button down in the center of the top. I made sure it went toward a straight edge. If I were to do it again I might instead create a loop on the tassel to slip around the button instead of gluing it.

Cap 5

5. Next, cut out a semi circle approximately 10 ½ inches in diameter. Stitch the curved edge. Leave the straight edge open. Create a casing or hem wide enough on the straight edge to feed the elastic through. Leave an inch unstitched to make an opening for the elastic.

Cap 6

6. Measure the baby’s head with the elastic to determine how much you need. Then use a safety pin attached to the elastic to pull it through the casing. Stitch the edge of the elastic and finish the hem opening.

Cap 7

7. Then position and the cap in the center of the bottom of the fabric-covered square, (remember the bottom is the side where fabric corners come together). Make sure the seam of the cap is pointing to a corner of the square and the tassel is on the side. Then glue the very center of the cap to the square with a hot glue gun. Then pin the cap down about 2 inches away from the center on all sides of the center and stitch it down.

 And. . .Tada!!! You’re little graduate is ready to go!


Baby Graduation Cap and Gown Baby Graduation Cap and Gown

 Don’t have time to make one? You can also buy them online 🙂

May 10

Forward with Faith!

This is probably my all-time favorite song ever. I discovered it while on my mission. My companion had it on her compilation of EFY songs. The lyrics mean a lot to me because whenever I was going through a hard time or feeling especially inadequate, listening to this song always had a sort of magic to it that uplifted my spirits and helped me to overcome discouragement. It makes me feel like “I can do it!” and motivates me to “fresh courage take.”  The line that says Faith in heaven lifts me up and shouts, I’ve just begun! gives me the happy feeling that I can always start life anew and make each day brighter than the day before. I feel so full of light and joy when I hear this song, as if all my doubts and fears are being overwhelmed by a flood of faith and hope. To this day, I can’t hear this song without thinking back with tearful gratitude to my sweet, life-changing experiences in the Philippines.

I also love the message of this song because of how much it reminds me of Alex. It seems like living by faith instead of fear has really become a major theme of his life and a motto that he lives by. That’s one of the things about him that has always inspired me. He’s always taking leaps of faith in his goal-setting and life’s ambitions instead of letting fear limit his potential to achieve. Doing so has greatly blessed his relationships as well. Instead of letting fear of rejection or awkwardness hold him back, he follows his impressions to do good and to serve others at every opportunity, full of faith that it will turn out to be a positive thing. Seeing his example makes me want to overcome my fears and act out of faith more often.

When choosing the songs for our wedding reception, I wanted this one to be on the list  because I feel that it represents the essence of our relationship. Really, our whole courtship was built on this principle. If Alex had stayed in his comfort zone instead of acting in faith in many instances to grow our relationship, we honestly probably would have never gotten to know each other very well under the circumstances, let alone get married. I’m so grateful he let his faith lead the way. I truly believe that once we learn to live by faith instead of fear, that’s when miracles will start to happen in our lives. As President Monson put it, “The future is as bright as your faith!”


Like the sunlight falls on me,
Light from heaven lets me see.
And when the mists arise to blind my eyes,
Then the truth shines upon me and I see
Fear is a lie.

(Chorus)
Fear is like the clouds that veil the earth from the sun.
Faith is like the morning rays that break when night is done.
And though the fear inside me says that all my hope is gone,
Faith in heaven lifts me up and shouts, I’ve just begun!

And then I sing a song of praise
For the hope within me raised.
From the heights above – faith and hope are mine.
The clouds that covered me and kept me down are far behind.

Fear is like the clouds that veil the earth from the sun.
Faith is like the morning rays that break when night is done.
And though the fear inside me says that all my hope is gone,
Faith in heaven lifts me up and shouts, I’ve just begun!

Believing leads to truth and light.
Fear can turn the day to night.
Even in the dark the way is clear –
Always follow faith and never fear!

Fear is like the clouds that veil the earth from the sun.
Faith is like the morning rays that break when night is done.
And though the fear inside me says that all my hope is gone,
Faith in heaven lifts me up and shouts, I’ve just begun!

May 10

Why I Love Easter

images

My favorite holiday is Easter. I feel like it’s an overlooked holiday that deserves more attention. I’m not really talking about the secular side of Easter, although I do think that even egg-hunts and the Easter bunny can be symbolic and point us to the real meaning of Easter. But the part about Easter I love most is the feeling of springtime as a symbol of the atonement and resurrection of Jesus Christ. I get a happy feeling of renewal and joy whenever I think about Easter because, to me, it’s a holiday that’s full of hope and light. That’s what I feel like Easter is all about – Hope.

The atonement of Jesus Christ offers us hope. As much as I love Christmas, I think Easter is even better because without the resurrection, there wouldn’t even be a reason to celebrate the Savior’s birth. But because Jesus Christ accomplished the atonement and overcame death, Easter happened, and life is full of miracles! We have the miracle of forgiveness, of overcoming our weaknesses and shortcomings, of becoming completely cleansed from our sins and of returning to live with Heavenly Father and with our families forever. Just thinking about it is refreshing and motivating for me. What greater miracle could we ask for than the atonement of Jesus Christ? I think that’s definitely worth celebrating.

Growing up, we didn’t have any extraordinary traditions at Eastertime, other than Easter egg hunts, a nice family dinner, and waking up to an Easter basket full of goodies on Easter morning. But I always felt the spirit in our home that day and it always felt like a special day. Maybe part of it had to do with the fact that it felt more peaceful than other holidays – we didn’t have to worry about all the festivities that can bring stress at other holidays.

I want to keep that peaceful feeling at Eastertime, but I think I’d like to really emphasize celebrating Easter with my children, by finding simple but meaningful ways to focus on Christ. In other words, I want Easter to feel like a big deal. I’ve been thinking about ideas of family rituals/traditions we could start doing around Eastertime. Maybe something as simple as watching a special film about Christ or gathering the family around to sing songs about the resurrection, or adding a little more symbolism to the egg hunt.

Really though, I feel like the greatest reminder of the real meaning of Easter is the feeling of springtime – of flowers blossoming, birds chirping, babies being born, and the frozen world turning warm and alive and colorful again – a symbol of the possibility that our “frozen” lives can be transformed by the empowering influence of the atonement in our lives. Does that make sense? I hope so. Hooray for Easter!
easter jesus

May 10

Having Oil in Our Lamps

“And at that day [the second coming], when I shall come in my glory,
shall the parable be fulfilled which I spake concerning the ten virgins.

ten virgins

For they that are wise and have received the truth,
and have taken the Holy Spirit for their guide,
and have not been deceived—verily I say unto you,
they shall not be hewn down and cast into the fire, but shall abide the day.”

(Doctrine & Covenants 45:56-57)

I love this painting of the parable of the ten virgins because of the bright contrast between light and darkness. I love D&C 45:57 because it sheds additional light on the symbolism of this parable.

What does the oil represent? I think it represents the Holy Ghost. The wise virgins were able to see their way in the dark because of their lamps. The scripture above indicates that they had the Holy Spirit as their guide. So clearly, having oil in our lamps is equivalent to having the Holy Ghost with us. If we live worthy of the gift of the Holy Ghost, we cannot go astray. It will be our constant companion and guide. It will be what cleanses us from our sins and makes us worthy to “abide the day.”

I love what Elder James E. Faust said:

“I believe that the Spirit of the Holy Ghost is the surest guardian of our inner peace. It can be more mind-expanding and can make us have a better sense of well-being than any chemical or other earthly substance. This Comforter can be with us as we seek to improve. It can function as a source of revelation to warn us of impending danger and also help to keep us from making mistakes. It can enhance our natural senses so that we can see more clearly, hear more keenly, and remember what we should remember. It helps us to be happy.”

When Christ comes again, we will not be able to borrow this light from others. We will have had to ingrain its influence in our own lives. If we neglected to do so, we will be left without a guide in the dark. But if we have oil in our lamps, we will be able to see clearly and abide the day.


Older posts «

» Newer posts